Most of the boy's lunch boxes are just sandwiches, he doesn't like a lot of things including pizzas, flavoured breads etc.
So when the chances come to do something different in a lunch box, I will. Last Sunday the 13 year old had to do a dress rehearsal for her Calisthenics Comp in the State (In Australia, it's not just simple exercises, Calisthenics is popular amongst the girls, it is a female competitive performing art featuring elements of rhythmic gymnastics and ballet combined with a strong emphasis on theatricality (both musical and dramatic), costume, dance and musical interpretation.
So she needs to bring a lunch, and we don't have any bread left...
How about Sushi? Of course she said, she loves sushi and I don't get a lot of chances to make her lunch box - she lives with her mum most of the time.
Sushi, can be fiddly, and can be quick, depends on what you want to do, I chose to do the hand rolls because it's easier for the children. I have some cucumbers and some smoked salmon, which made it rather easy. I don't really like the idea of making fresh fish sushi as the requirement for freshness is quite strict, but with smoked salmon, it's safer.
I normally just cook plain rice for sushi, best to use fresh cooked rice, but if you are in a rush to make them in the morning, I guess the short cut is to cook the rice the night before, keep it warm in the rice cooker, or reheat rice with microwave from fridged rice, not the best, but it does take a while for rice to cook in the morning (I know I know, not authentic enough hehe)
Add sushi vinegar (Japanese rice vinegar) and bit of sugar, break down the rice whilst cooling it, smoked salmon is pretty salty already and there's no need for extra salt in the rice.
Have a bowl of water with a bit of rice vinegar, to wash hands in case it gets sticky, lay the cooled rice carefully on the sheets, leave about 1" on top blank and tap with a bit of water, put in the fillings
and roll.... Squeeze a bit hard by the time it's formed the roll with the bamboo sheet...
and cut in half to fit into the lunch box (it's winter and I made them around 9:30 in the morning for B to take it for lunch, I'd recommend ice pack in the lunch box if in warmer days with vegetarian varieties)
Simple.... and both girls like it....
Ever since lasagne became part of the staple dishes on Australian dinner tables, there are different varieties of lasagne made, in restaurants, homes etc, and every family have add their own personal tough to it, some may not be that Italian.
In my family, I'm probably the only one who prefers ricotta cheese instead of the traditional bechamel sauce, spinach or egg plant instead of any type of meat. The meat eaters prefer what they know best, the lasagne with Bolognaise sauce - Ragu alla Bolognese. However as Luke doesn't like bacon in his sauce, we only use bacon or pancetta when we have visitors.
I usually make my own pasta sheets for the lasagne - it's cheaper and never fails.
This is how we did it a couple of nights ago anyway:
Our Family Lasagne – Bolognese
Bolognese Sauce:
1 clove of garlic
1 onion, finely diced
Half red capsicum
Half of one shredded carrot,
1 shredded zucchini
Fresh parsley, finely chopped, about ¼ cup
Fresh Basil, finely chopped, about ¼ cup
Fresh oregano finely chopped, 1 tsp.
600g beef premium mince (we usually use just beef mince or beef premium mince, however some recipes do specify beef, veal and pork mince in equal portions)
2 stripes of bacon (finely chopped, optional)
1 can of peeled Italian tomatoes with juice
1 bottle of passata sauce 500ml
1 tsp of all spice
1 tsp of smoke paprika (this is definitely not traditional but family seem to like it)
Bit of cracked black pepper
2 tsp salt
¼ tsp raw sugar
2 tbsp olive oil
1/3 cup red wine
Béchamel Sauce:
2/3 cup mozzarella cheese
1 tsp salt
1 tsp white pepper
30g plain flour
40g butter
300ml milk
50ml full cream
Lasagne Sheets:
2 eggs (large, 59g)
200g plain flour (best to use “00”)
1 tsp salt
2 tsp olive oil
Extra mozzarella cheese.
1. Make pasta dough, make a well of plain flour, salt on working bench, and crack the eggs in. Make a rough dough and add in the olive oil. I prefer to work with pasta dough with olive oil as it’s easier to knead and less sticky – less dusting flour needed. It’s a hard dough and kneading is necessary to work out the gluten needed for the pasta sheets. Once the dough is smooth, let it set in a cool place cover with damp cloth (if it’s warm days, let it stay in the fridge)
2. Put olive oil to frying pan, sauté onion and garlic, add bacon to caramelise if adding bacon, for about 2-3 minutes, add mince, caramelise till fragrant, deglaze with wine, add herbs, mix well and then add shredded vegetables, add passata and peeled tomato, mix well and add all spice and paprika, salt, and cracked pepper. Cover lid and stir. Cook on lowest heat for 1 hour, make sure the sauce don’t dry out, if it does, add a bit of water or beef stock. By the time the sauce is ready to be assembled, it should be quite thick.
3. Make Béchamel sauce. Put butter in another non stick pan, and add flour when butter is all melt. Gently stir to cook the flour and add cream and milk. Stir well and make sure there’s no lumps of flour. Until it’s like a roux. Add salt and pepper to season. Add cheese, mix well till all melt. Take off heat and keep it warm.
4. By now, it’s time to make pasta. Cut dough into 3 portions and roll out to 0.5cms thick or thinner, so it will pass through the pasta maker. Fold and roll again, for a couple of times to work the gluten of the dough, until you are happy with the texture, smooth and silky. Adjust the dial and roll until it’s the thinnest – my pasta maker is manual and I usually prefer when it says 0.
5. Assemble. I like to use the normal loaf tins as it’s easy for me to serve and if there’s a tray that’s not being finished, I can freeze it as whole and no separate containers needed. This recipe makes 3 of 12cm X 24cms loaf tins. I normally put white sauce first, and then the pasta sheet, and then the bolognaise sauce, then the pasta sheet and the white sauce and another layer of bolognaise sauce, and then the pasta sheets and the white sauce and top with extra mozzarella cheese.
6. Bake in 190C oven for 30 minutes.
I suppose the children should still eat some greens... they don't usually like to have vinegarette so just a few lettuce leaves and slices of cucumber will do...
After the big afternoon tea at nephew's 21st birthday party, the family's pretty full, with all the sushi rolls, prawn dumplings, the magnificent chocolate cake with big chocolate curls, profiteroles, eclairs.....
So we had simple dinner today, meat balls in Napoli sauce, with home made gnocchi, gnocchi is pretty easy to make once you've made a few batches and the shop ones just don't taste as nice - so much softer with the home made gnocchi, and there's no reason for us to use shop ones any more.
But it's Saturday night and we do always have dessert when we have all the children.
So I made a simple lemon pudding with blood orange sauce, it's still the citrius season, lots of oranges and the lemon tree is producing well this year as well. We have lemon Myer at home which is quite juice, but not as good for zesting, still.
It's a very quick dessert - about 15 minutes for the preparation really and then the baking.
The cake itself can be used as a moist lemon butter cake, if dust with icing sugar only. It's not heavy and quite refreshing because of all the citrius used.
Saucy Lemon Pudding / Cake
• 150g Self Raising flour
• 125g butter
• 150g white sugar
• Juice of half a lemon and zest of 2 lemons
• 2 eggs
• 150ml plain yoghurt
• ½ Tsp
Sauce
• Juice of 1.5 lemons
• Juice of 1 blood orange (I just happenned to buy some blood oranges @ $1.99 a kilo, and they have nicer taste, normal oranges will do the job fine.)
• 250g white sugar
Method
Eggs and butter to room temperature.
Cream sugar and butter on low speed on bench top mixer.
Add eggs, one by one, increase speed to medium high.
Add lemon zest and juice, mix well, speed stays medium high.
Add yoghurt, mix well, stay the same speed.
Add flour, mix well.
Put batter in pre-greased 22cm round cake tin (I used silicon tin this time and there’s no need to grease the silicon cake tins).
Bake in preheated 185C oven for 35 minutes till ready.
Meanwhile, add lemon and blood orange juice to small sauce pan, add butter and bring it to boil, for 5-6 minutes.
Serve cake with syrup and cream as pudding.
It's still cold out there, we had a big hail storm.
So the slow cooker was the way to go again, with a bit of everything, and it's a hearty meal with a budget and minimum time - the slow cooker did most of the job and we were coming home to a warm dinner.
Winter Warming Spicey Beef Rib Stew
1.5 Kilo of Meaty Beef Spare Ribs – cut by butcher in 1-1.5 inch cubes
3 large Desiree potatoes, skinned and cubed.
1 carrot, skinned and cubed
½ cup of mixed beans (I used pinto beans and chick peas, soaked overnight)
2 small onions, cut in chunks.
3-4 bay leaves (I used dried ones as I haven’t got fresh ones on hand this time)
1 tbsp paprika powder (Hungarian style)
1 tsp cumin powder
1 tsp nutmeg powder
1 tsp clove powder
1 tsp cinnamon powder
Bit of ground black pepper
1 tbsp white pepper grounded
¼ cup of plain flour
½ cup of dry red wine
1 tbsp salt
1 tsp raw sugar
1 cup beef stock
¼ cup plain yoghurt (I normally use Greek style)
Method:
Cut vegetables in cubes and mix the spices in a seperate bowl, soak the beans and chick peas over night.
Coat ribs with a mix of plain flour and white pepper, heat a bit of cooking oil in pan and lightly brown sides of the ribs.
Add vegetables to the bottom of slow cooker, and then add the ribs.
Add all the spices and the bay leave and then add the red wine, stock and salt and sugar.
Turn the slow cooker on high for 20 minutes and then switch to slow, cook for 6 hours or more. If continue to cook on high, you will only need half of the cooking time.
Add yoghurt and stir through, cook for a further 30 minutes and serve with Kartoffelpuffers…
Because the children are still young, we do tend to eat chicken a fair bit, it's tender enough for them and is pretty meaty, the meat itself is neutral in flavour, so it's suitable for whatever spices or flavours...
And it's always an option for a budget dinner, can be prepared quickly as well.
Sometimes when the family go to some of the small Chinese restaurants, hubby would like to order the Tong Kong Salt Roast chicken, usually they use free range chicken, and traditionally it's a chicken wrapped in paper, and roasted in a big clay pot of salt, on stove top, slow cooking. The main flavour came from a mix of pepper, madarin peel powder, and most importantly, the sand ginger (kencur), with out that, the flavour is not there. Tong Kong is one of the Cantonese names for Hakka, and it's quite a popular dish in most Cantonese restaurants with a Hakka chef.
Of course, it's a bit hard to replicate the whole recipe with a lot of salt - what I'm going to do with it afterwards? So I did a quick version using the oven:
Tong Kong Paper Roast Chicken
2 tbsp salt
1 tsp white pepper
1 tsp Sichuan pepper
1 whole chicken 1.2kg
1tsp 5 spice powder
1.5 tbsp sand ginger (kencur) powder
1 knob of ginger
1 onion – sliced (or spring onion, cut in chunks)
Several pieces of dry mandarin peels, soaked
Mix all dry ingredients, salt, peppers, ginger stout, and 5 spice powder, in a small bowl, use 3/4 of it to rub the skin of chicken and marinate inside of chicken.
Put ginger, onion (or spring onion) and mandarin peels inside chicken and secure with skewer.
Marinate chicken for 1 hour.
Wrap with baking paper and roast in 185C oven for 45 min – 1 hour, till cooked (traditional method was pot roasting in salt).
Cut in chunks, drizzle the chicken with the juice left in the paper bag, serve with the rest of marinating spices and serve with rice.
Tuesday evenings are usually a rush for us, the boys will go for their music lessons, that's hubby's guitar and the boy's piano lessons. So everything have to be quick and pasta is actually the most common dish on Tuesday nights.
Tonight, I made a simeple pasta bake, with enough vegetables and my favourite Ricotta cheese and Mozzarella cheese...
Double Cheese Chorizos Pasta Bake
2 Raw Chorizos sausages
5 Sprigs of parsley
1 Green Capsicum
1 zucchini
2 medium ripe tomatos
250g Ricotta cheese
100g Mozzarella cheese
Salt and Ground white pepper to taste
1/3 cup olive oil & 1.5 tbsp extra
1 small onion
300g big shell pasta
Water to boil pasta
Extra salt
Method
In a big pot, boil pasta as per instruction of the packet, add bit of salt to taste to water, simmer till it’s al dente.
At the mean time, slice chorizos, onion, capsicum and zucchini and tomatoes.
Finely chop parsley (I usually use continental parsley)
Drain pasta in colander and put it back into the pot, add 1/3 cup olive oil and stir through.
In a non stick frying pan, add the extra 1.5 tbsp olive oil, gently sauté the onion and capsicum in medium heat and add chorizos, sauté till almost cooked.
Add these to the pasta, and add tomatoes, stir through ricotta cheese and salt and pepper, mix well.
Put in ceramic baking dish and top with shredded mozzarella cheese.
Bake in 190C oven for 25-30 minutes.
This is a single serve baking dish actually, but I still prefer it in the plate:
Just something simple for the children.
Well, I had to make a cake for the cake stall in the Election Booth for Luke's school.
But after the cake was made, the children, especially the 3 year old Monique got upset.... Where's the cake mum.
So I made another one, just a simple chocolate sponge with ganache, a bit of coffee flavour.
Chocolate Coffee Sponge Cake with Chocolate Ganache
100g SR flour
50g butter
150g Raw Sugar
4 eggs
1 tsp vanilla
2 tbsp cocoa powder
1 tsp espresso coffee powder dissolved in 1 tbsp hot water
Chocolate Ganache
200g Fresh thickened Cream
50g butter
100g sugar
150 Lindt’s Dark Chocolate Orange
Method:
Beat the eggs on highest speed for 7-8 minutes, add sugar gradually and beat for a further 5-6 minutes
Add sifted flour, and keep beating.
Add Cocoa Powder, and espresso. And mix well to form smooth batter
Fold in melted butter, use 22cm round bake tin, bake in 190C for 35 minutes.
To make simple chocolate ganache
Boil cream and butter, melt chocolate and mix in sugar, make sure it’s smooth.
It's a bit more moist than ordinary sponge.
I tried the tangzhong method again, the water roux.
I can't say I followed the recipe exactly, but pretty much similar:
Water roux:
20g plain flour
100g water
Dough:
350g bread flour
160g milk
5g dry instant yeast
30g sugar
5g salt
35g butter.
I had some custard filling and sugar crust already made from last batch of pineapple buns (they don't have pineapples in them but the crust was scored to look like pineapple skins?)
I made the water roux as per instruction, made the dough and proof the dough as normally it would happen for us and then shaped the buns with fillings and covered with the crust:
They proof alright,
I didn't watch the oven and I must admit I was 3 minutes too late...
But nothing too exciting about the result... so I'm not really sure water roux is the way to go or not for the next batch of bread, whatever it is.
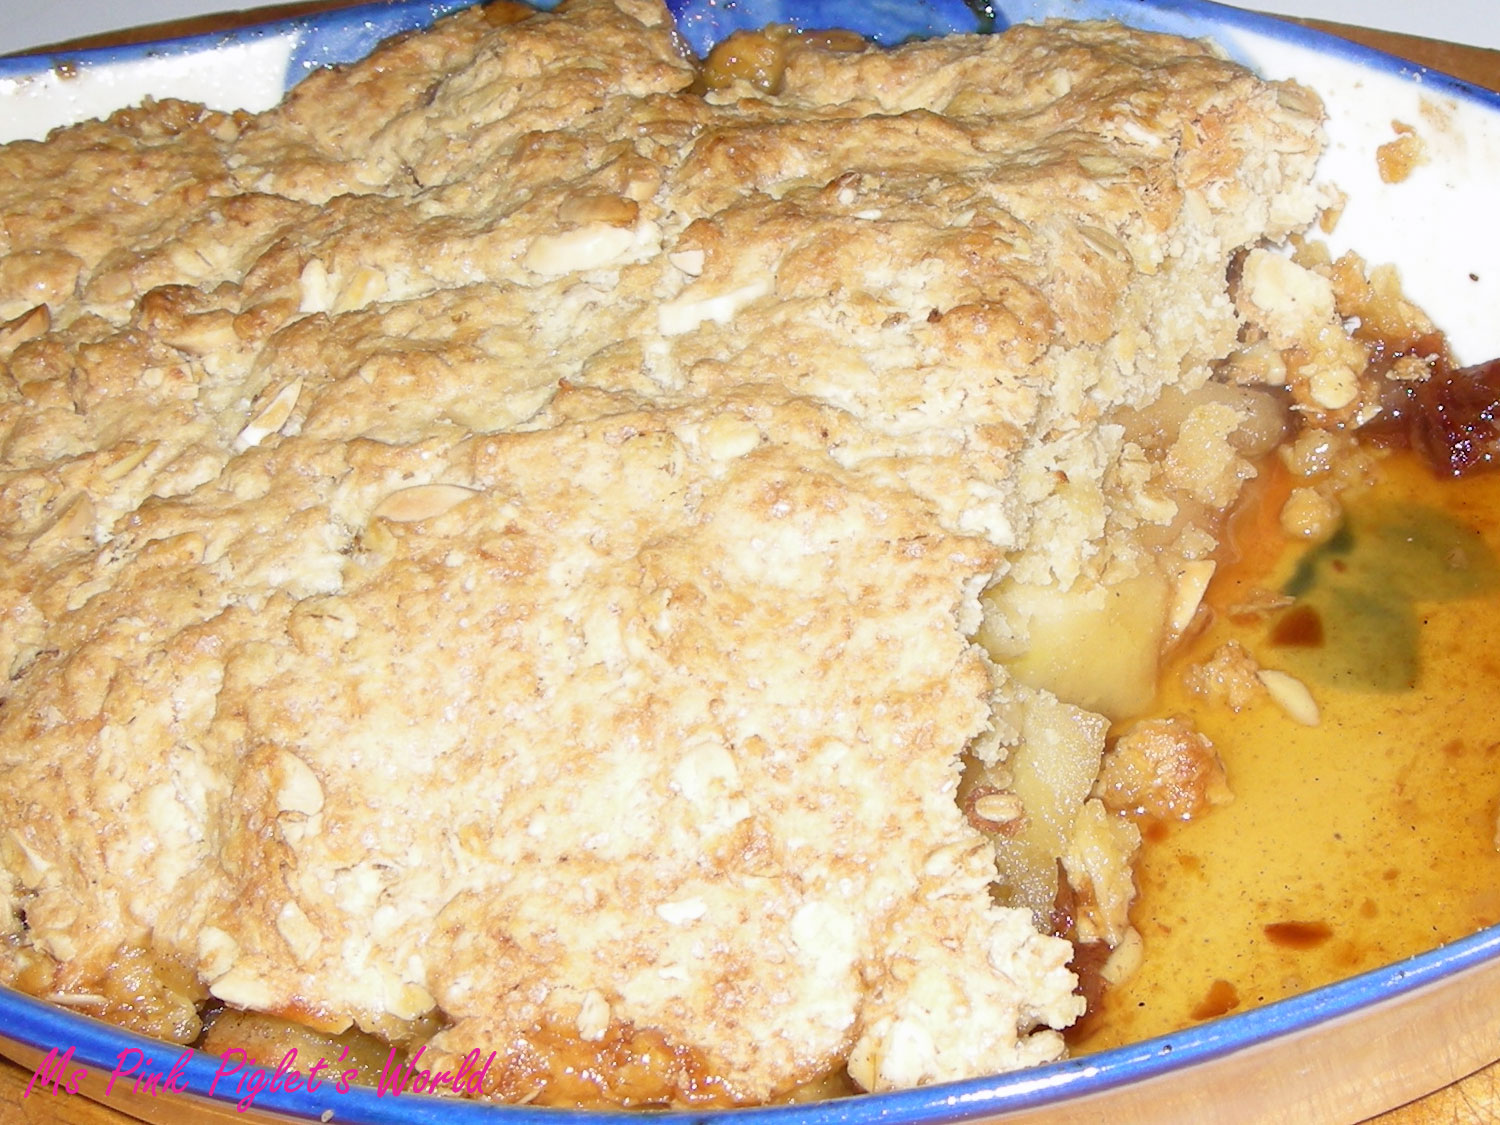
Mums in Luke's school been talking about winter dessert and the crumbles.
This was made last weekend actually, when we had enough numbers to sit down at the dinner table for a proper dessert, really quick and easy, a good way to make children eat some apples, and when we are rushed, it can be served with just fresh cream.....
Apple and Date Crumble
4 Pink Lady Apples, pealed cored and sliced.
175g raw sugar
165g plain flour
100g butter cut in cubes
1 tsp all spice
1 tsp cinnamon powder
1 tsp vanilla essence
Juice of 1/3 of lemon
2/3 cup rolled oats,
½ cup slivered almonds
1 egg
2/3 cup sliced pitted dates
1. My oval baking dish is 18cms in width and 25cms in length (not counting the wings). Mix the apple with 100g sugar, cinnamon powder and all spice and dates, toss well and spread to the bottom of the baking dish, add vanilla and lemon juice and toss gently.
2. Mix flour and the rest of sugar, rub in butter until it resembles bread crumbs, add in lightly whisked egg and form a rough dough.
3. Mix in almond and oats, spread evenly on the apple. Bake in the 190C oven for 45 minutes or until top golden brown.
One thing I must say here is that a normal crumble recipe doesn't call for an egg in the crumble, I actually made it more like a pie because it's got quite a thick cookie top, but family liked the quick sweet fix regardless.
Quiches... Just so versatile and quick, great way to get the children to eat some vegetables...
There are so many things you can make into quiches and most of all, they are all yummy.
Tonight however, as we didn't feel like a big dinner, I thought of a quick quiche again and this time, I used smoked salmon. I have some sour cream pastry made last time and stored in the freezer, so I used that as base and I must say, Maggie Beer's sour cream pastry is a winner.
Smoked Salmon Quiche
150g smoked salmon
1 small green capsicum
2 small onions
2/3 cup shredded mozzarella cheese
1 cup milk
1 medium ripe tomato
½ cup thickened cream
1 tsp white pepper
1.5 tsp salt
2 eggs
50g butter
50g plain flour
Sour cream pastry
125 g plain flour
100 g unsalted & chilled butter
60 ml sour cream (approx.)
Method:
Sour Cream Pastry:
Chop all the butter into small cubes. Weigh flour and put into mixer. Blend flour and butter until it resembles a large breadcrumb consistency.
Add sour cream gradually.
Turn onto a floured bench and pull together with your hands into a rectangle shape. Wrap in plastic wrap and chill for at least 20 minutes before rolling out and lining your tin. Chill in fridge.
Sour Cream Pastry By Maggie Beer
To quiche
Thinly slice capsicum, onions and tomato.
Add a bit of olive oil to non stick frying pan and sauté capsicum and onions until almost cooked.
Beat eggs with salt.
Add flour and mix well.
Add cream and milk, mix well, make sure no lumps from flour.
Add white pepper, vegetables and shredded smoked salmon.
Add in melted butter and shredded cheese, mix well.
Pour in shell and bake in 190C for 45 minutes.
The Pastry is very short, and the salmon wasn't too salty at all in the quiche.
Mum used to make them, little Frankfurt Cocktail sausages rolled in breadrolls, you can find them in bakeries as well, great for children's lunch boxes, parties.... and really simple to make. Mum never really taught me how she did it, as she never used any measurements and pretty much a touch and feel cook, so I just used my own bread recipe...
Pigs in Blankets – Hot Dog Rolls.
350g plain flour
220ml lukewarm milk
5g yeast
½ tsp salt
2 tbsp sugar
40g butter
18 cocktail Frankfurts, skin on
Add yeast to lukewarm water, set aside 10-15 minutes till frothy.
Put flour onto the working bench with salt and sugar, make a well, make sure salt is on the bottom of the flour.
Put milk in and make a rough dough.
Knead for 2 minutes and gently knead in butter, bit by bit.
Knead dough till elastic and not sticky.
Set dough aside covered under damp cloth to proof, till double or more.
Knock air out of dough and knead, shape into a long log and cut small amounts out, roll out to 0.8mm thin long stripes, about 4cms x 20cms, fold once in the middle so the stripe now is 2cms in width and wrap the clean cocktail Frankfurt sausages (you can have the skinless ones, but the result is better with the Frankfurts with the skins)
Set it to proof for 45 minutes to 1 hour, brush on egg wash.
Bake in 190C oven for 15-18 minutes.
Submit this to Susan's YeastSpotting as fun food....
Hubby loves his steak and chips meal, typical male...
Children love their chips as well. And from the discussions from Masterchef forums, I learnt that duck fat is the best for cooking the perfect chips... Well, not exactly healthy, but why not. Duck fat are sold in local butcher and poultry shops and ever since Masterchef, it's on the Cole's shelves as well, $5.95 for 500g, not exactly budget. Lucky for me, I also learnt from the forums that duck fat is just duck fat, save some when roasting the ducks, and that's what I did, apart from the perfect free range duck for the Duck A L'orange, I end up with a jar of duck fat, perfect for the special treats like chips, roast potatoes and ah, the York Shire Pud....
We bought some nice juice scotch fillets from the butcher and some sausages - steaks are not so "children" friendly just yet, although the 10 year old is getting used to the lamb, but beef, he's still having a bit of trouble, he prefers mince. Same thing with the girl.
The steaks are not thick cuts, about 2cms thick, so 2 minute on one side and flip over for another 1.5 minute on hot frying pan (I'd normally use griller but children don't like char grilled marks on their sausages so I just used to big frying pan instead) and then rest aside for a minute (I let the steaks stay in the same pan with the lid on to rest this time.)
I have done the chips the way George Calombaris taught in the Master Class (he's one of the coolest chefs by the way), they were nice but it takes a long time to dry out the chips boiled in water. My short cut is the microwave.... I peeled and cut the potatoes in desired shapes, put the chips in the microwave steamer, and in there on high for 6 minutes. Let them out to cool in colander, they got dry at the same time as cooling down, the microwave version of the preparation will cook the chips initially, but won't make them too wet.
After 30-45 minutes, they were ready for the deep frying, in the bubbling duck fat.
Normally I'd make some garlic and herb butter for the steaks, but since I have got some beurre blanc sauce left over from the other night in the fridge, I just used the same sauce again..... All we need is beer now.
Ever since Alvin made his drunken chicken on MasterChef, hubby's been asking me to make it... It's a simple recipe and because the children can't really eat the chilli spicey salad, we just served it with a bit of cucumbers.
My family usually prefer smaller chicken, hence half the liquid used...
And I was too lazy to go get some mirin so end up using a bit of cream sherry instead, and added a bit of ginger and 5 spice to give a bit of extra flavour, with 2 tbsp of light soy. Well, not exactly Alvin's recipe, but boiled drunken chicken is the first time for us, we usually do the drunken chicken the traditional way - marinate in uncooked wine.
It's nice though, and the sauce is not "drunken" at all, even Luke had some with his rice.
Well.... for some reason, Char Shiu Baos are quite popular in Australia. Not sure why, I was never a fan of it myself. Hubby always thought they were great, but since I'd never eat it during yumcha, he seems to miss out a bit.
By the way, back in Canton, or Guangzhou - the proper name, the Char Shius were never this red. Guess that's the reason why I don't use red powder in my Char Shius, not sure why the food colouring is necessary here.
Anyway, back to the buns. Apparently I made too much the other night (Wednesday?) The children were only able to eat that much, I gave some to mum and dad, Graeme had it for dinner and lunch the next day, and still some left over - I used to be able to eat some, I must admit I don't like pork at all, but since I had this big stomach problem after eating out, 1 week ago, I haven't been able to eat any meat. Of course, I still have some marinating Char Shiu Sauce.
Found out that I still have some super white flour left in cupboard. Usually the Baos are made of the super white flour I buy from the Asian grocery shops. There are 2 types, one imported from Hong Kong, sold in 1kg plastic packs, the other made in Australia, sold either in 10kg big paper packets or some smart shop owners separate them into roughly packed plastic bags.
I usually choose the later. Support local industry, and probably, better quality. Maybe the flavour wise, the imported version is better, but I do tend to buy everything Australian made if I can. Higher food safety standards.
Rant over. This is the recipe, well, this is how I did it this time.
Char Chiu Bao – BBQ Pork Buns
Make 12 Baos, they are not big.
Fillings:
150g Char Chiu
75ml Char Chiu Sauce
2tsp raw sugar
Wrap:
250 Super White Bao Flour
1 tsp yeast
150ml Water and Milk Mixture (half each)
1 tsp salt
2 tbsp sugar
Put flour on working bench make a well, put yeast at one side and salt and sugar on the other side, gently pour in lukewarm liquid mixture, knead dough. Knead till elastic and not sticky and set the dough aside covered by damp cloth to proof till double the size.
Roll the dough into a long log shape and cut small pieces, knead, shape and roll out to a thin round shape like dumpling skin, put a bit of fillings in and fold up on top with little swirling folds, forming a parcel shape, leaving a bit of air hole on top.
Line a piece of muslin cloth at the bottom of steam rack, heat up pot of water till water boils vigorously.
Place baos onto the steam rack, make sure they have space in between them, steam in high heat for 15 minutes.
By the way, any plain flour will do the job, but Cantonese do prefer white baos... not sure it changes the flavour to use normal plain flour? I don't get a lot of feedback from the people who eats them in regards to the different texture of flours... I must say that this bao recipe's wrapping is not 100% cantonese. The actual yumcha style Baos contain a bit more sugar, and the wrapping is a lot sweeter. The initial dough is wetter, and was kneaded after the first proofing with a bit more dry flour and corn flour and white sugar. I've made that version before, and found it's too sweet so I cut it back to the current version.
Yeah yeah, I have always been telling people to just use the Char Shiu sauce out of the jar.
Add a bit of honey and dark soy, you are on your way.
But making own Char Shiu sauce can be fun, you can vary the ingredients and adjust to personal taste.
After all, Char Shiu is just Cantonese Barbeque Pork.
Anything goes yeah? as long as the family eat it, or, friends.
Made this earlier during the week, Char Shiu, is one of the easiest Cantonese style roasts, however, you do need to plan one day ahead.
Char Shiu – BBQ Pork
• ¼ cup dark soy
• 750 Pork Neck (I used Scotch Fillet this time)
• ¼ cup light soy
• 1.5 tbsp maltose
• 2 tsp raw sugar
• 1 tbsp dark miso (or dark bean paste – Dou Ban Sauce)
• 1/3 cup shao xin wine
• 1.5 tsp ginger powder
• 1.5 tsp 5 spice powder
Method
Gently simmer all marinate materials, maltose need to be melted down to combine.
Cut pork in 2” width stripes, marinate in sauce over night (24 hours or more), turn if not all soaked.
Brush on honey and roast on rack in 180C oven for 45 minutes till ready.
If the meat is getting dry, you can brush on a bit of sauce and honey during the roasting process.
That night, we served it with just some noodles.
One of our colleagues in the team will be going overseas for 6 weeks... A trip to Canada and the States, river cruise... Lucky him.
So we had a morning tea and we are bringing something to work. I made this because it's easier to cut into slices and bring just enough to the office, rather than the whole cake - cheese cakes are usually filling and we only have a small team, not even people to finish the whole cake. I used the lamington tray and that's just right for this recipe...
I normally make baked cheese cakes, not chilled, not sure why? I think I'm just used to the baked cheese cakes. I've made so many different cheese cakes in my baking life so I didn't use any recipes from the books, so it's just something I put up together, well, almost. I couldn't find the chocolate ripple biscuits I thought I had, so instead of the chocolate biscuit base I thought I'd use, I end up having to make a chocolate short crust pastry base, so I referred to my trust worthy Le Cordon Bleu pastry and tarts cook book, a simple book with all the pastries and basic techniques. A bit of alteration, of course.
Baked Lemon Coconut Cheesecake Slices with Chocolate Chips
Base:
200g Plain Flour
50g Icing sugar*
25g dark cocoa powder*
1 pinch of salt
1 egg
100g butter
Crumb cold butter into the mix of flour, cocoa, salt and icing sugar until it resembles bread crumbs, add in lightly whisked egg and form a rough dough.
Chill in fridge covered with glad wrap and set for half an hour to one hour.
Roll out into the rectangle shape of the lamington tray, in between baking paper (using enough to be able to fold over to cover) and blind bake with weights in 190C oven for 30 minutes(I use rice because I accidentally bought some very yukky rice, that will only be suitable for using as weights – bye bye Jasmine).
*Note, the original Le Cordon Bleu recipe specified white sugar with no specified amount, and cocoa powder was added by me to make sure it's a chocolate cookie base.
Fillings:
250g cream cheese
250g clotted cream
200g thick vanilla yoghurt
2 eggs
¾ cup shredded coconut
¼ cup dark chocolate chips.
1/3 cup fine almond meal
Zest of 1 lemon (I have lemon myer at home)
½ cup sugar
Beat cream cheese, clotted cream and thick vanilla yoghurt till creamy. Add in sugar and mix well. (use bench top mixer, it’s easier and I can still dance around getting rid of all the sugar I spilled on flour while it’s mixing everything quietly!)
Beat in the eggs, one at a time till creamy.
Add in coconut, and almond meal, mix well.
Zest the lemon (Thank God for the new Breville’s bench top mixer, I can zest the lemon whilst it’s mixing quietly, how wonderful…. It’s nice and smooth)
Finally, fold in the dark chocolate chips with spatular (hmm, it’s the time not to use the mixer, unless you don’t want chunky chocolate bits)
Bake in 190C oven for 40 minutes, cool (in the tray, don’t take out.. must always remind myself, I have had one cheese cake disaster during my baking life, forgot it was a cheese cake and stupid enough to do the skewer test, end up totally burning the whole thing, not any more. Cheese cakes, especially baked cheese cakes….. should be a walk in the park)
And chill in fridge for 4 hours or more before cutting into slices…


